

Animating on the IPad
How to use RoughAnimator and Procreate Apps to create painterly animation on the iPad

“Fossil” Trixy Wattenbarger, 2022, Rough Animator and Procreate with a touch of AfterEffects
Many people prefer creating videos and artwork on the iPad versus a laptop or desktop computer. The tablet is mobile, has a high resolution screen and the apple pencil feels good in your hand. There are a lot of good apps to choose from depending on what you want to create. Lately, I’ve been using Rough Animator combined with Procreate to animate my augmented reality paintings. The workflow allows me to animate anywhere- at the beach, on a lounge chair, in a tent… I’ve done some of my best work on airplanes. Below is an overview of my workflow.
Step One: Make a painting
The artwork can be a digital drawing, photograph, or handmade image. I prefer to draw and paint on paper. The texture of handmade paintings appeal to me, and I enjoy finding ways to bring those qualities into the digital world. It gets me away from screens for a while and helps me generate ideas.

“Christine” Trixy Wattenbarger, 2022, gouache and marker on paper
Step Two: Refine the motion in Rough Animator
Procreate is an unparalleled painting app. A few years ago, they added an animation assist function. Unfortunately, it’s kind of clunky and adjusting frame timing is a pain. Rough Animator has a user friendly interface and excellent 2D animation tools. The timeline is similar to most desktop animation programs, and it’s easy to make timing and layer adjustments. You can even do camera moves. Like the name says, it’s great for creating rough animation. The coloring tools allow you to create good looking flat fills and lineless work. You can create your own brushes, but they don’t have a lot of texturing and blending capabilities. For a painterly look, I finish in Procreate.

Rough Animator Interface
Step Three: Add color and texture in Procreate
This step is a bit tedious and time consuming, but definitely worth it if you want a handmade look. I basically rotoscope (paint over) each frame of the rough animation trying to match to texture and color of the original painting. The movie is exported out of Rough Animator, then imported into Procreate. Every frame becomes a separate layer in the layers panel. I then add a new layer and group it with the rough animation’s layer/frame. This is what I mean by Procreate animation being clunky and tedious. Of course the bonus is all those beautiful and customizable brushes! After painting each frame, I delete or hide the rough animation layer. You may need to delete these layers as you go along since there is a limit on the number you can have in Procreate.
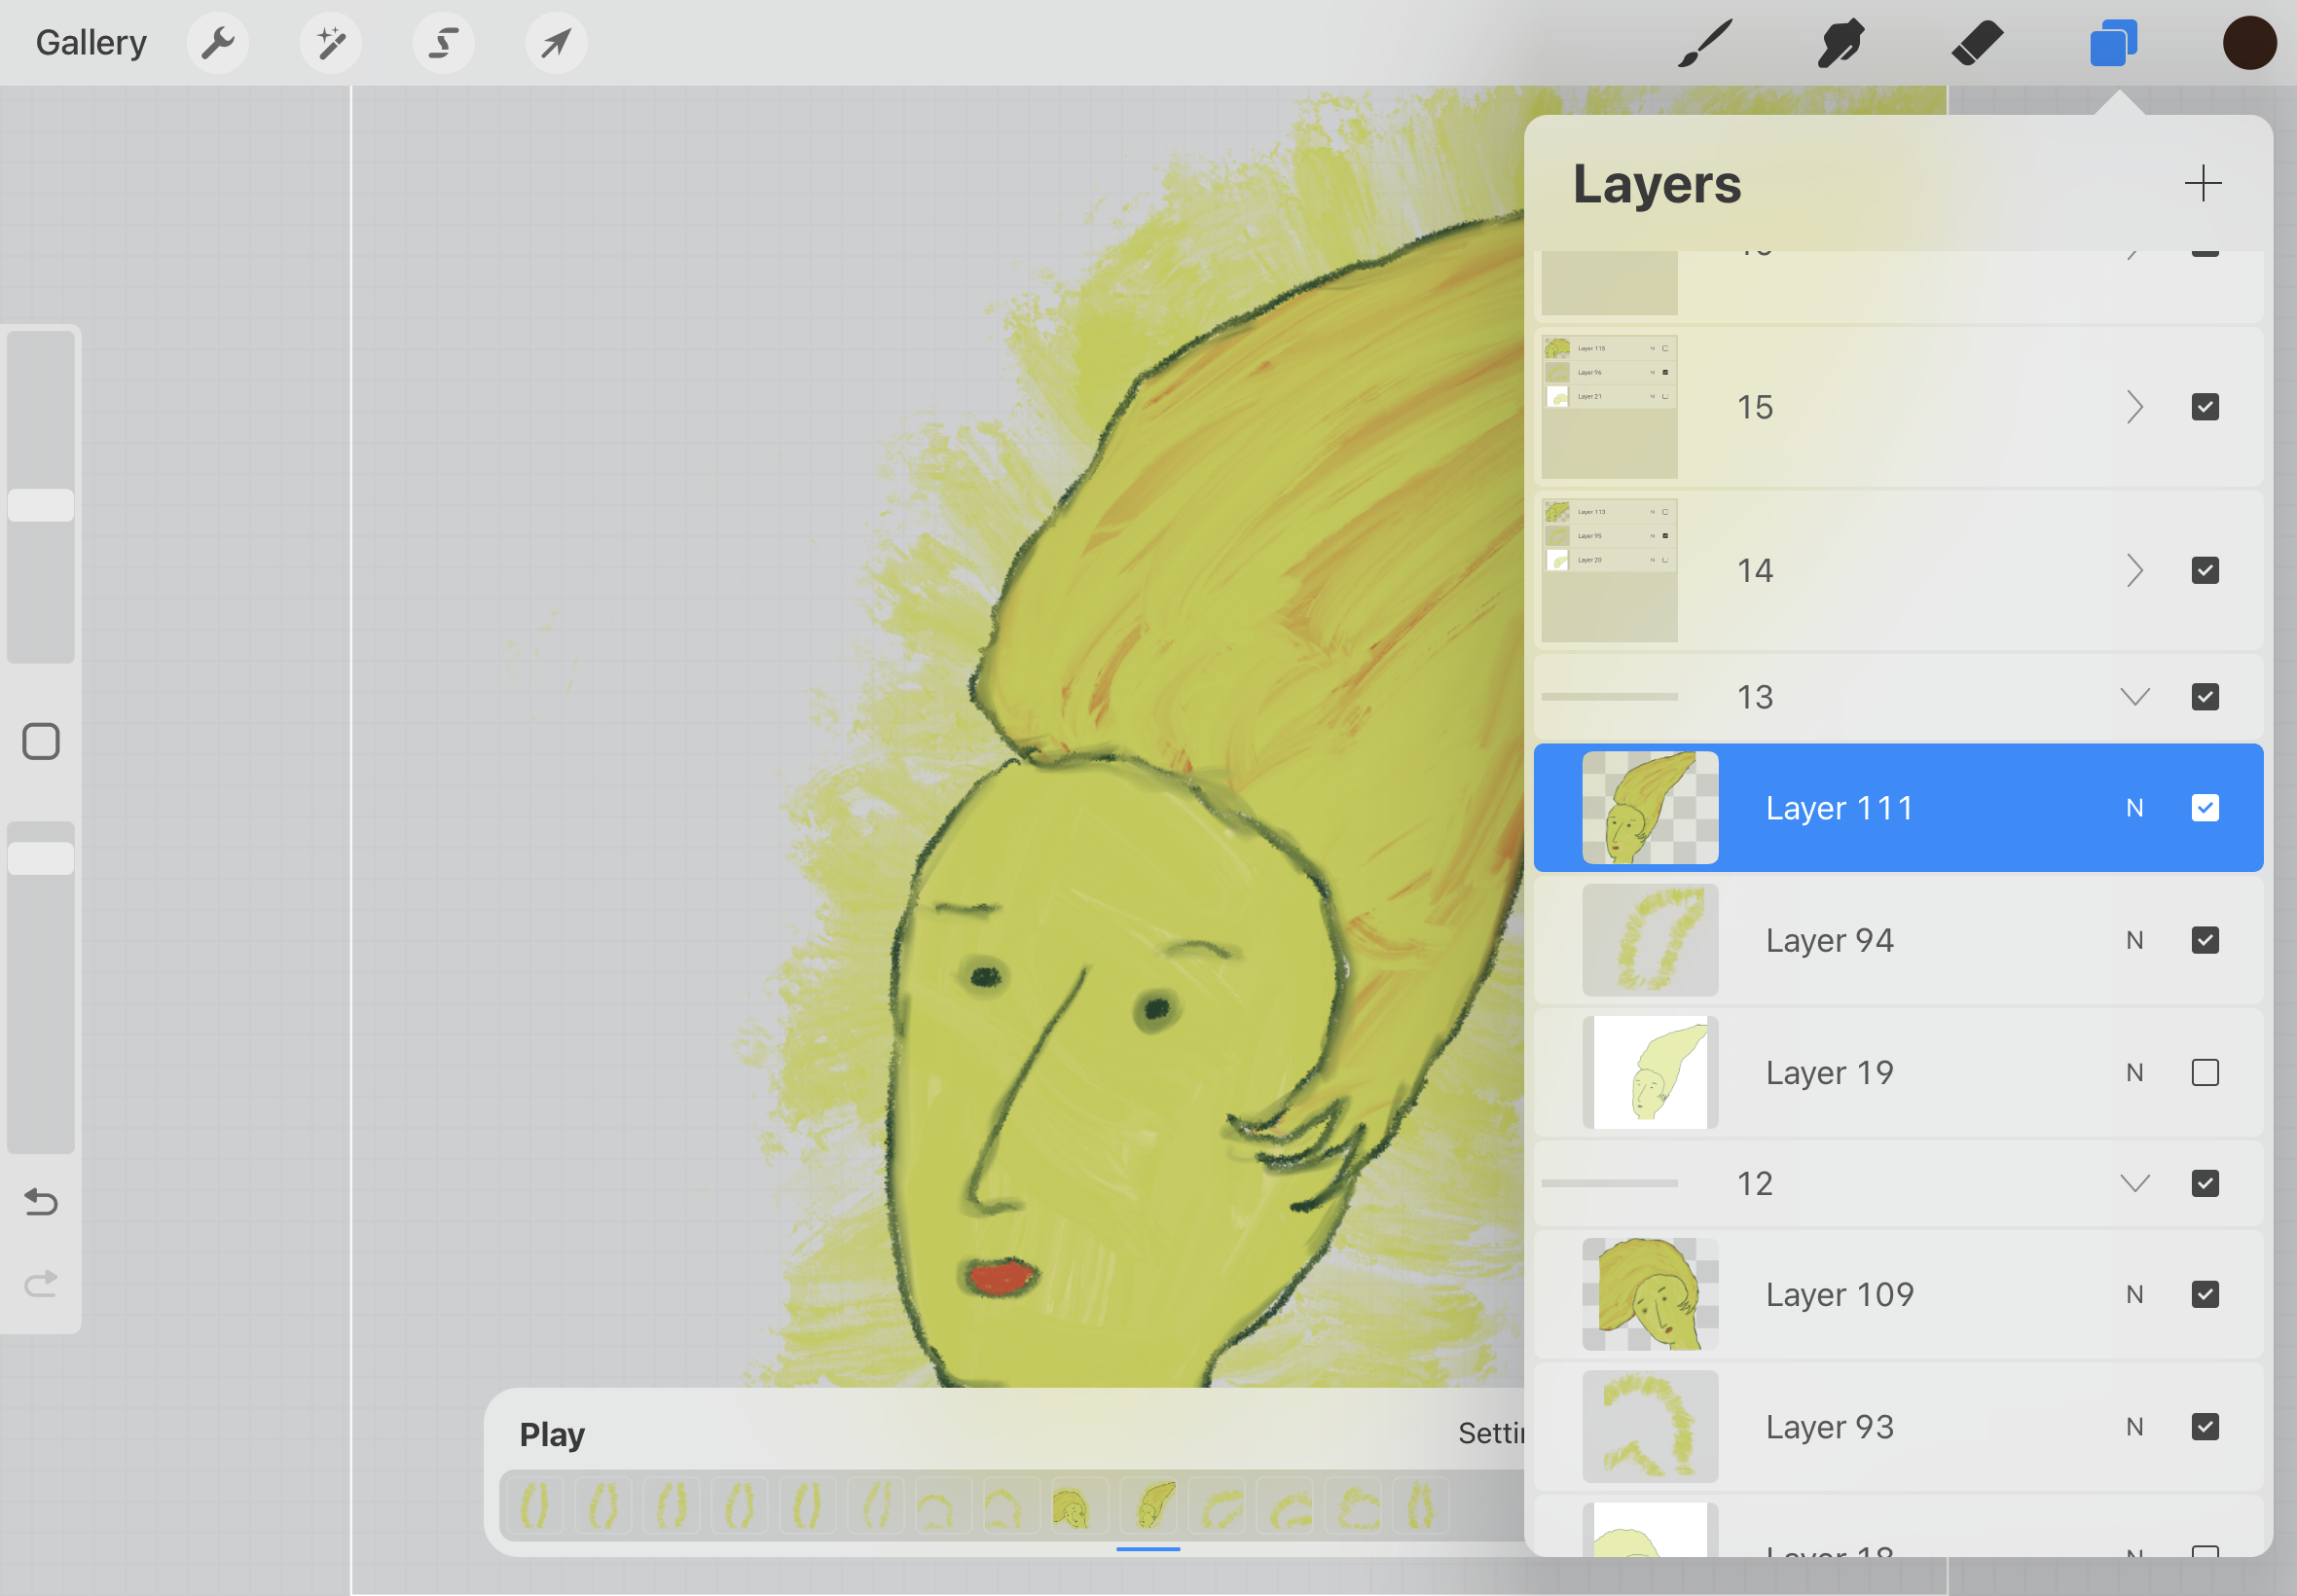
Procreate interface showing the layer groups
Lastly, download your animation from Procreate as an h264 and share it on social media or YouTube!

“Christine” animation for augmented reality painting, Trixy Wattenbarger, 2022, created with Rough Animator and Procreate on the iPad